Prescription widget — Overview
The prescription widget is a self-contained JavaScript component you embed inside your doctor-facing web app to render the full electronic-prescription flow. It's the widget for OSIGU's ePrescription (EHR) product and calls the /ehr/... endpoints under the hood. It handles:
- Patient resolution — either from an existing
patient_idyou pass in, via inline lookup on the doctor's directory, or by creating a new patient right in the form. - Payer selection — the doctor picks which sponsor/payer the prescription is being issued under.
- Diagnosis capture — searchable ICD-10 picker backed by Osigu's catalogue.
- Medication capture — filtered by the provider's registered products, with posology and duration. Includes the doctor's favourites list for one-click reuse.
- Labs and imaging studies — the same prescription can carry lab orders and imaging-study orders alongside medications.
- Issuance — calls
createPrescriptionv1, v1.1, or v2 depending on the doctor's contract (Osigu picks the right endpoint). - Preview & delivery — shows the doctor a preview of the final prescription and offers a one-click "send to patient" after issuance.
Under the hood the widget uses the same REST endpoints you'd hit yourself.
When to use it
- You want a compliant e-prescription flow without building the picker UI, the ICD-10 search, the posology validators.
- Your provider is already onboarded to Osigu's medication catalogue with their provider products registered.
- You're OK with Osigu owning the flow's UX and legal-text placement.
Screens
The widget renders as a single scrollable form split in two blocks (patient info + prescription) and finishes with a preview step before the prescription is sent to the patient.
- Patient
- Prescription
- Preview & send
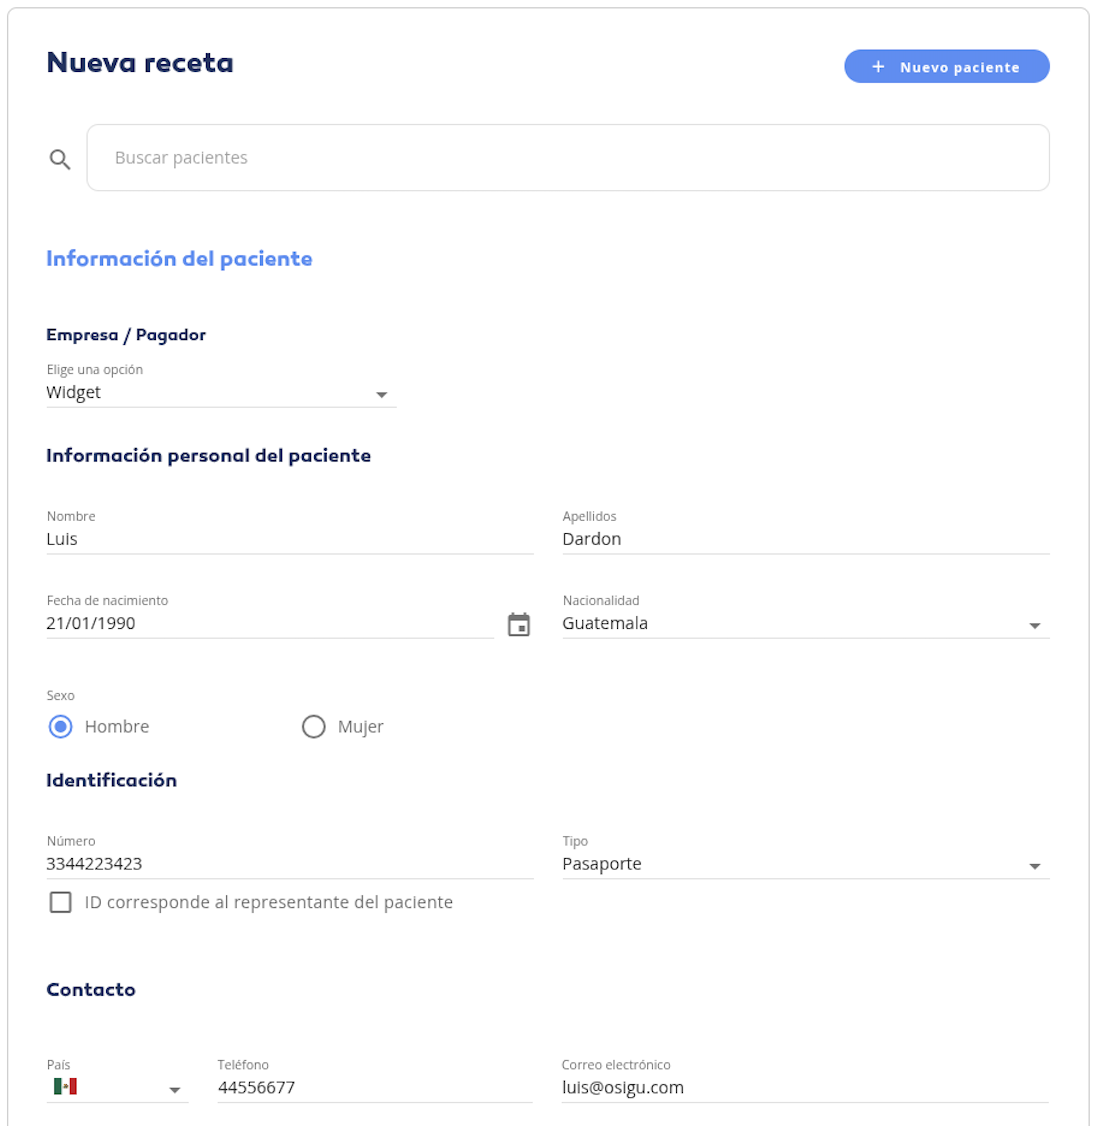
Top block of the form. The doctor picks the payer (sponsor), fills in the patient's personal info, identification, and contact. Existing patients can be pulled from the doctor's directory with the search bar; new ones are created inline with the + Nuevo paciente button.
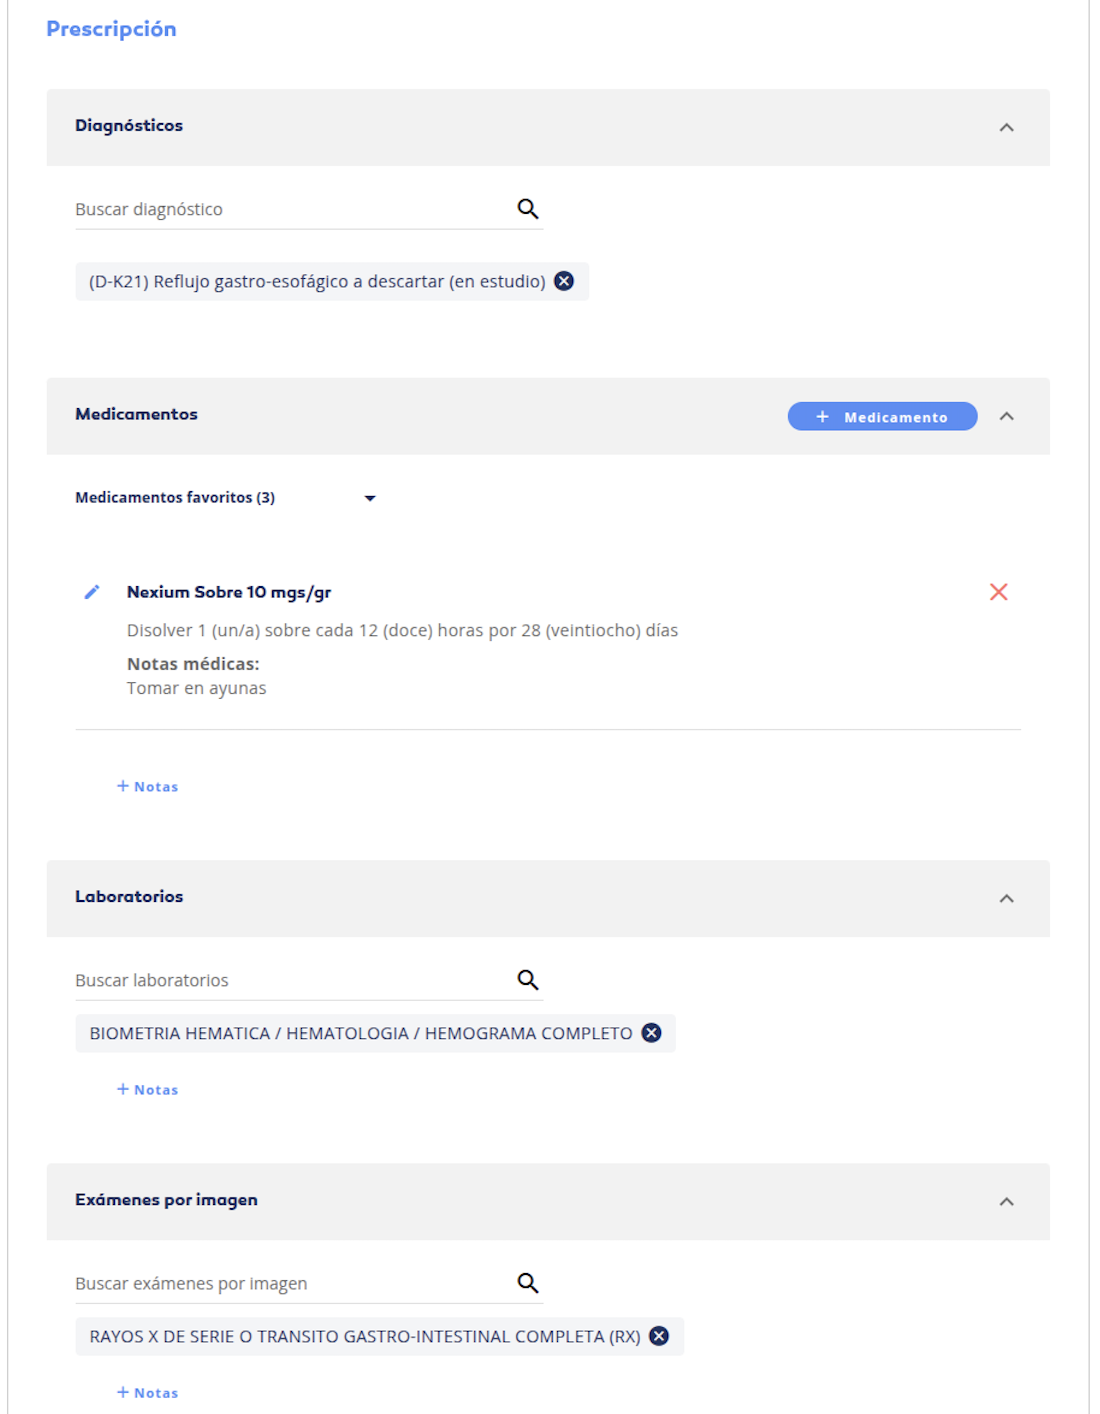
Bottom block of the form. Four collapsible sections: Diagnoses (ICD-10), Medications (with the doctor's favourites for one-click reuse), Labs, and Imaging studies. Each can carry notes, and the same prescription can mix all four.
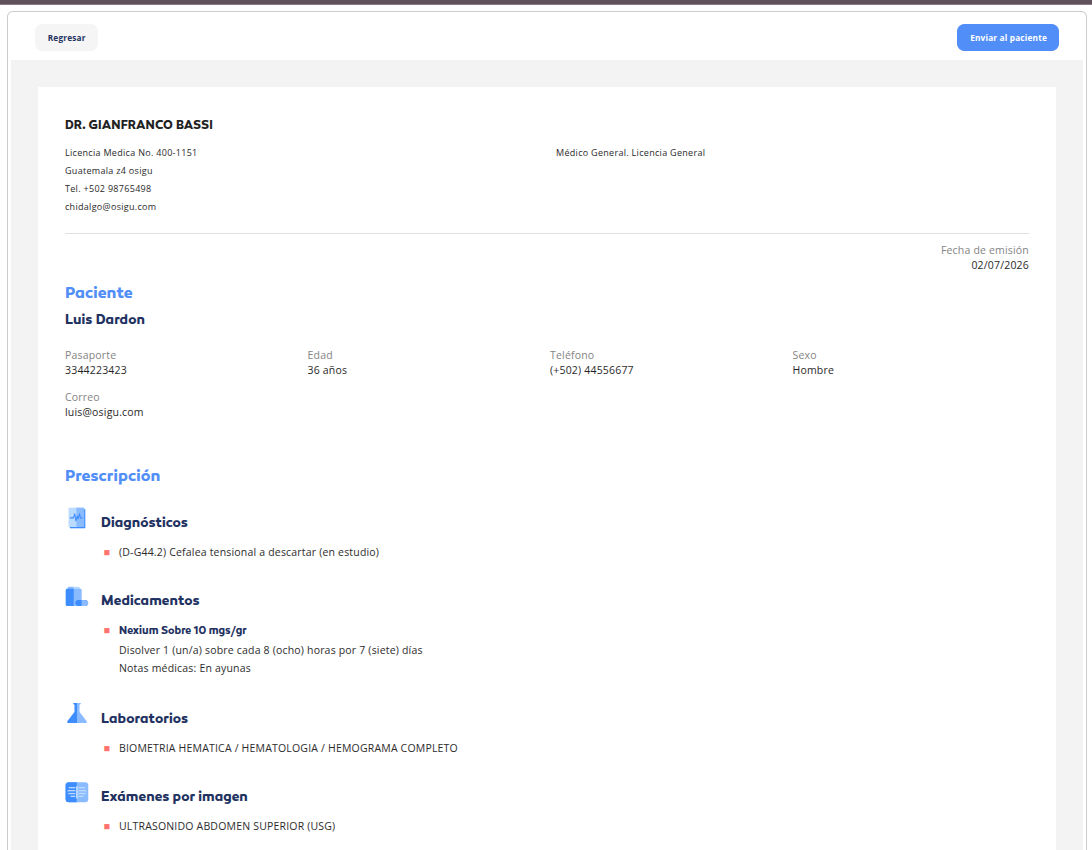
Preview shown after Emitir. The doctor reviews the compiled prescription — header with their credentials, patient info, and every section they filled — and hits Enviar al paciente to dispatch it. Regresar goes back to edit.
Anatomy
Conceptually, the widget renders five sections inside your host <div> plus a preview step:
Layout and styling are up to Osigu — see the screenshots above for the actual rendered look.
Contract with your app
Your app is responsible for:
- Loading the widget — one
<script>tag pointing tohttps://widgets.osigu.com/v1/loader.js. - Providing an OAuth token — via
getToken()in the config. - Handing outcomes back to your app logic — the widget emits
complete,error,close.
The widget is responsible for:
- Rendering the flow, in the language matching your app's locale.
- Calling every REST endpoint the flow needs.
- Picking the right prescription-creation endpoint (v1 / v1.1 / v2) based on the provider configuration.
- Handling the patient-data-consent prompt for v1.1 / v2 markets.
- Reporting a single, structured outcome via
complete.
What the widget doesn't do
- Doesn't dispense — the pharmacy dispenses the prescription later via the Dispensing API or a separate PoS system.
- Doesn't persist to your database — you get the outcome via event, persist however you like.
- Doesn't handle doctor authentication — you supply the OAuth token; the widget just uses it.
Version selection
You don't pick v1 vs v1.1 vs v2 in the widget config — it's driven by your provider configuration on Osigu's side. During onboarding, Osigu wires which prescription version your provider is authorised for. If you need to switch (e.g. adding v1.1 consent capture for a new market), contact Osigu.
Next steps
- Installation — load and mount.
- Configuration — options.
- Events — callbacks and payloads.
- Customization — theming.
- Troubleshooting — when it goes wrong.