Pre-authorization widget — Overview
The pre-authorization widget is a self-contained JavaScript component you embed inside your web app to render the full ARC pre-authorization flow. It handles:
- Beneficiary search — dynamically rendering the sponsor's form and validating the input.
- Product selection — pulling from the provider-products list for the chosen sponsor and product type.
- Indication capture — file upload (or Base64), with the sponsor-required
file_type. - Request complete — including OTP prompt if the sponsor demands it.
- Outcome — surfaces the resulting authorization codes (or the rejection reason) via a
completeevent.
Under the hood the widget calls the same REST endpoints you'd call yourself — but it does the wiring, the state machine, and the error handling for you.
When to use it
- You want the pre-auth flow live without spending weeks on the UI.
- Your product doesn't need a custom step inside the flow (approvals, additional captures).
- You're happy inheriting Osigu's UX improvements over time — no code changes on your side.
Screens
The widget renders in three screens the beneficiary steps through — plus a modal that opens when adding a medication.
- Medications
- Diagnoses
- Add-medication modal
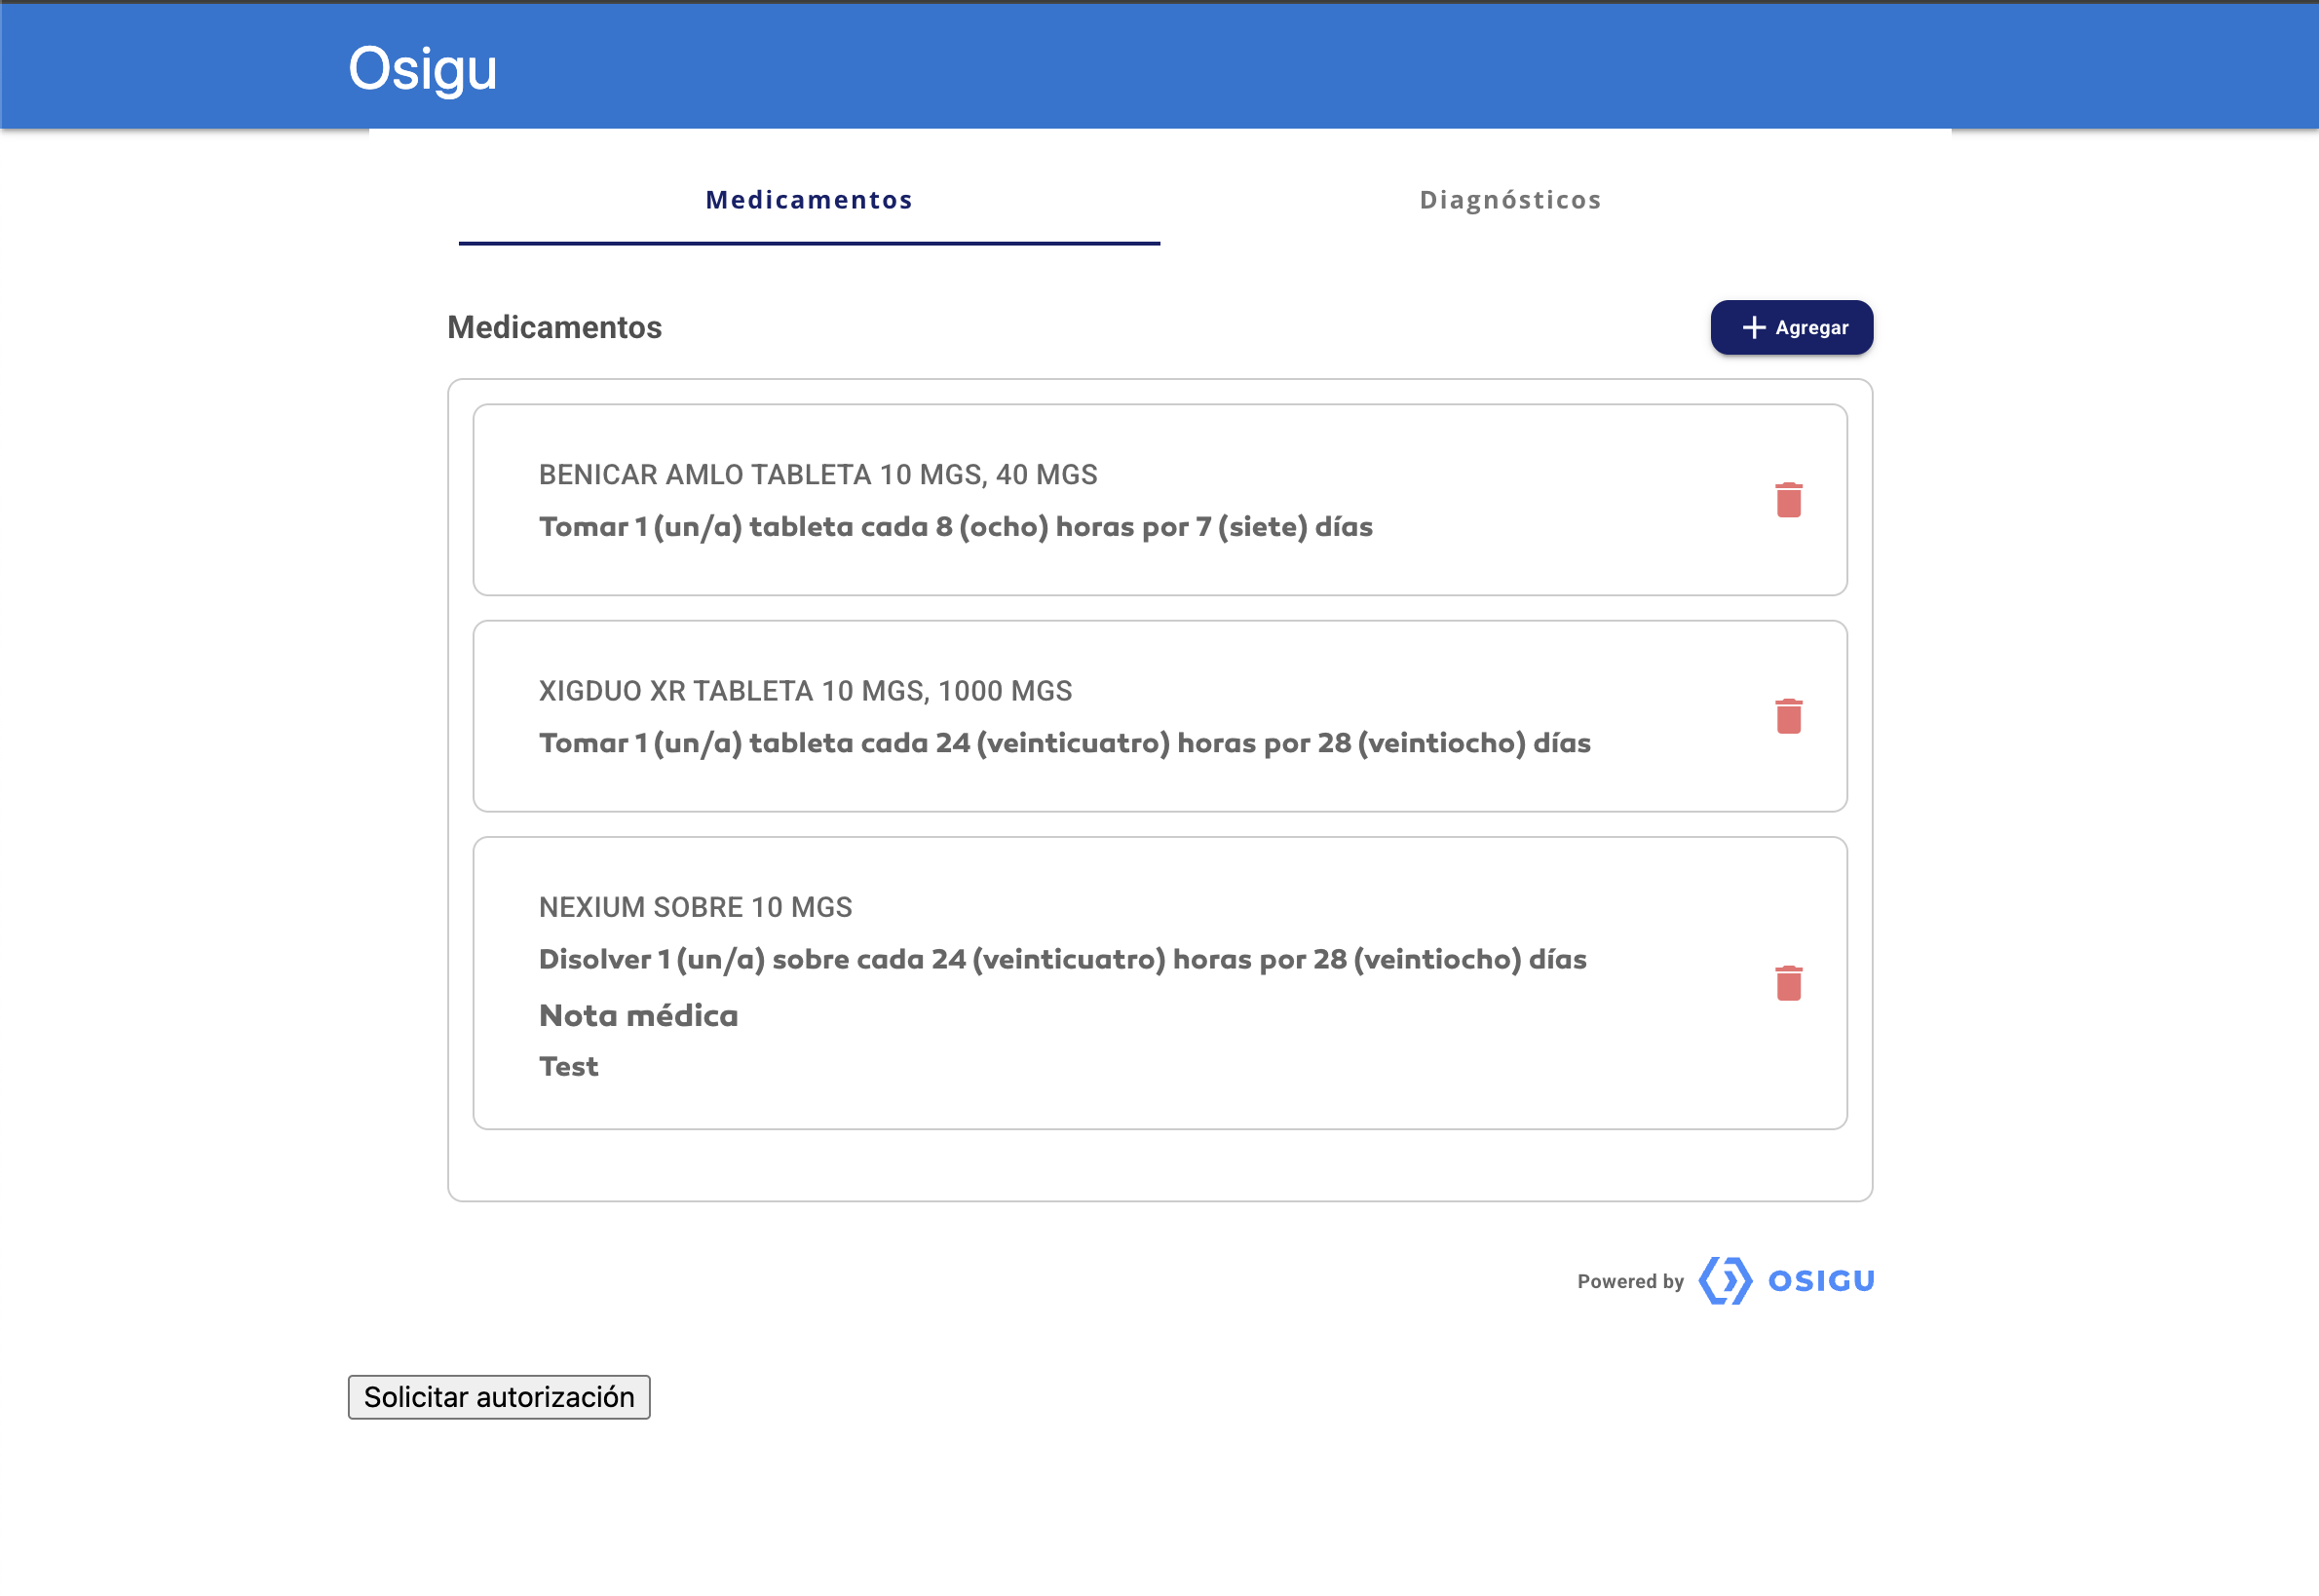
List of medications the doctor has added to the request, with dose and posology per item. The + Agregar button opens the modal shown in the last tab.
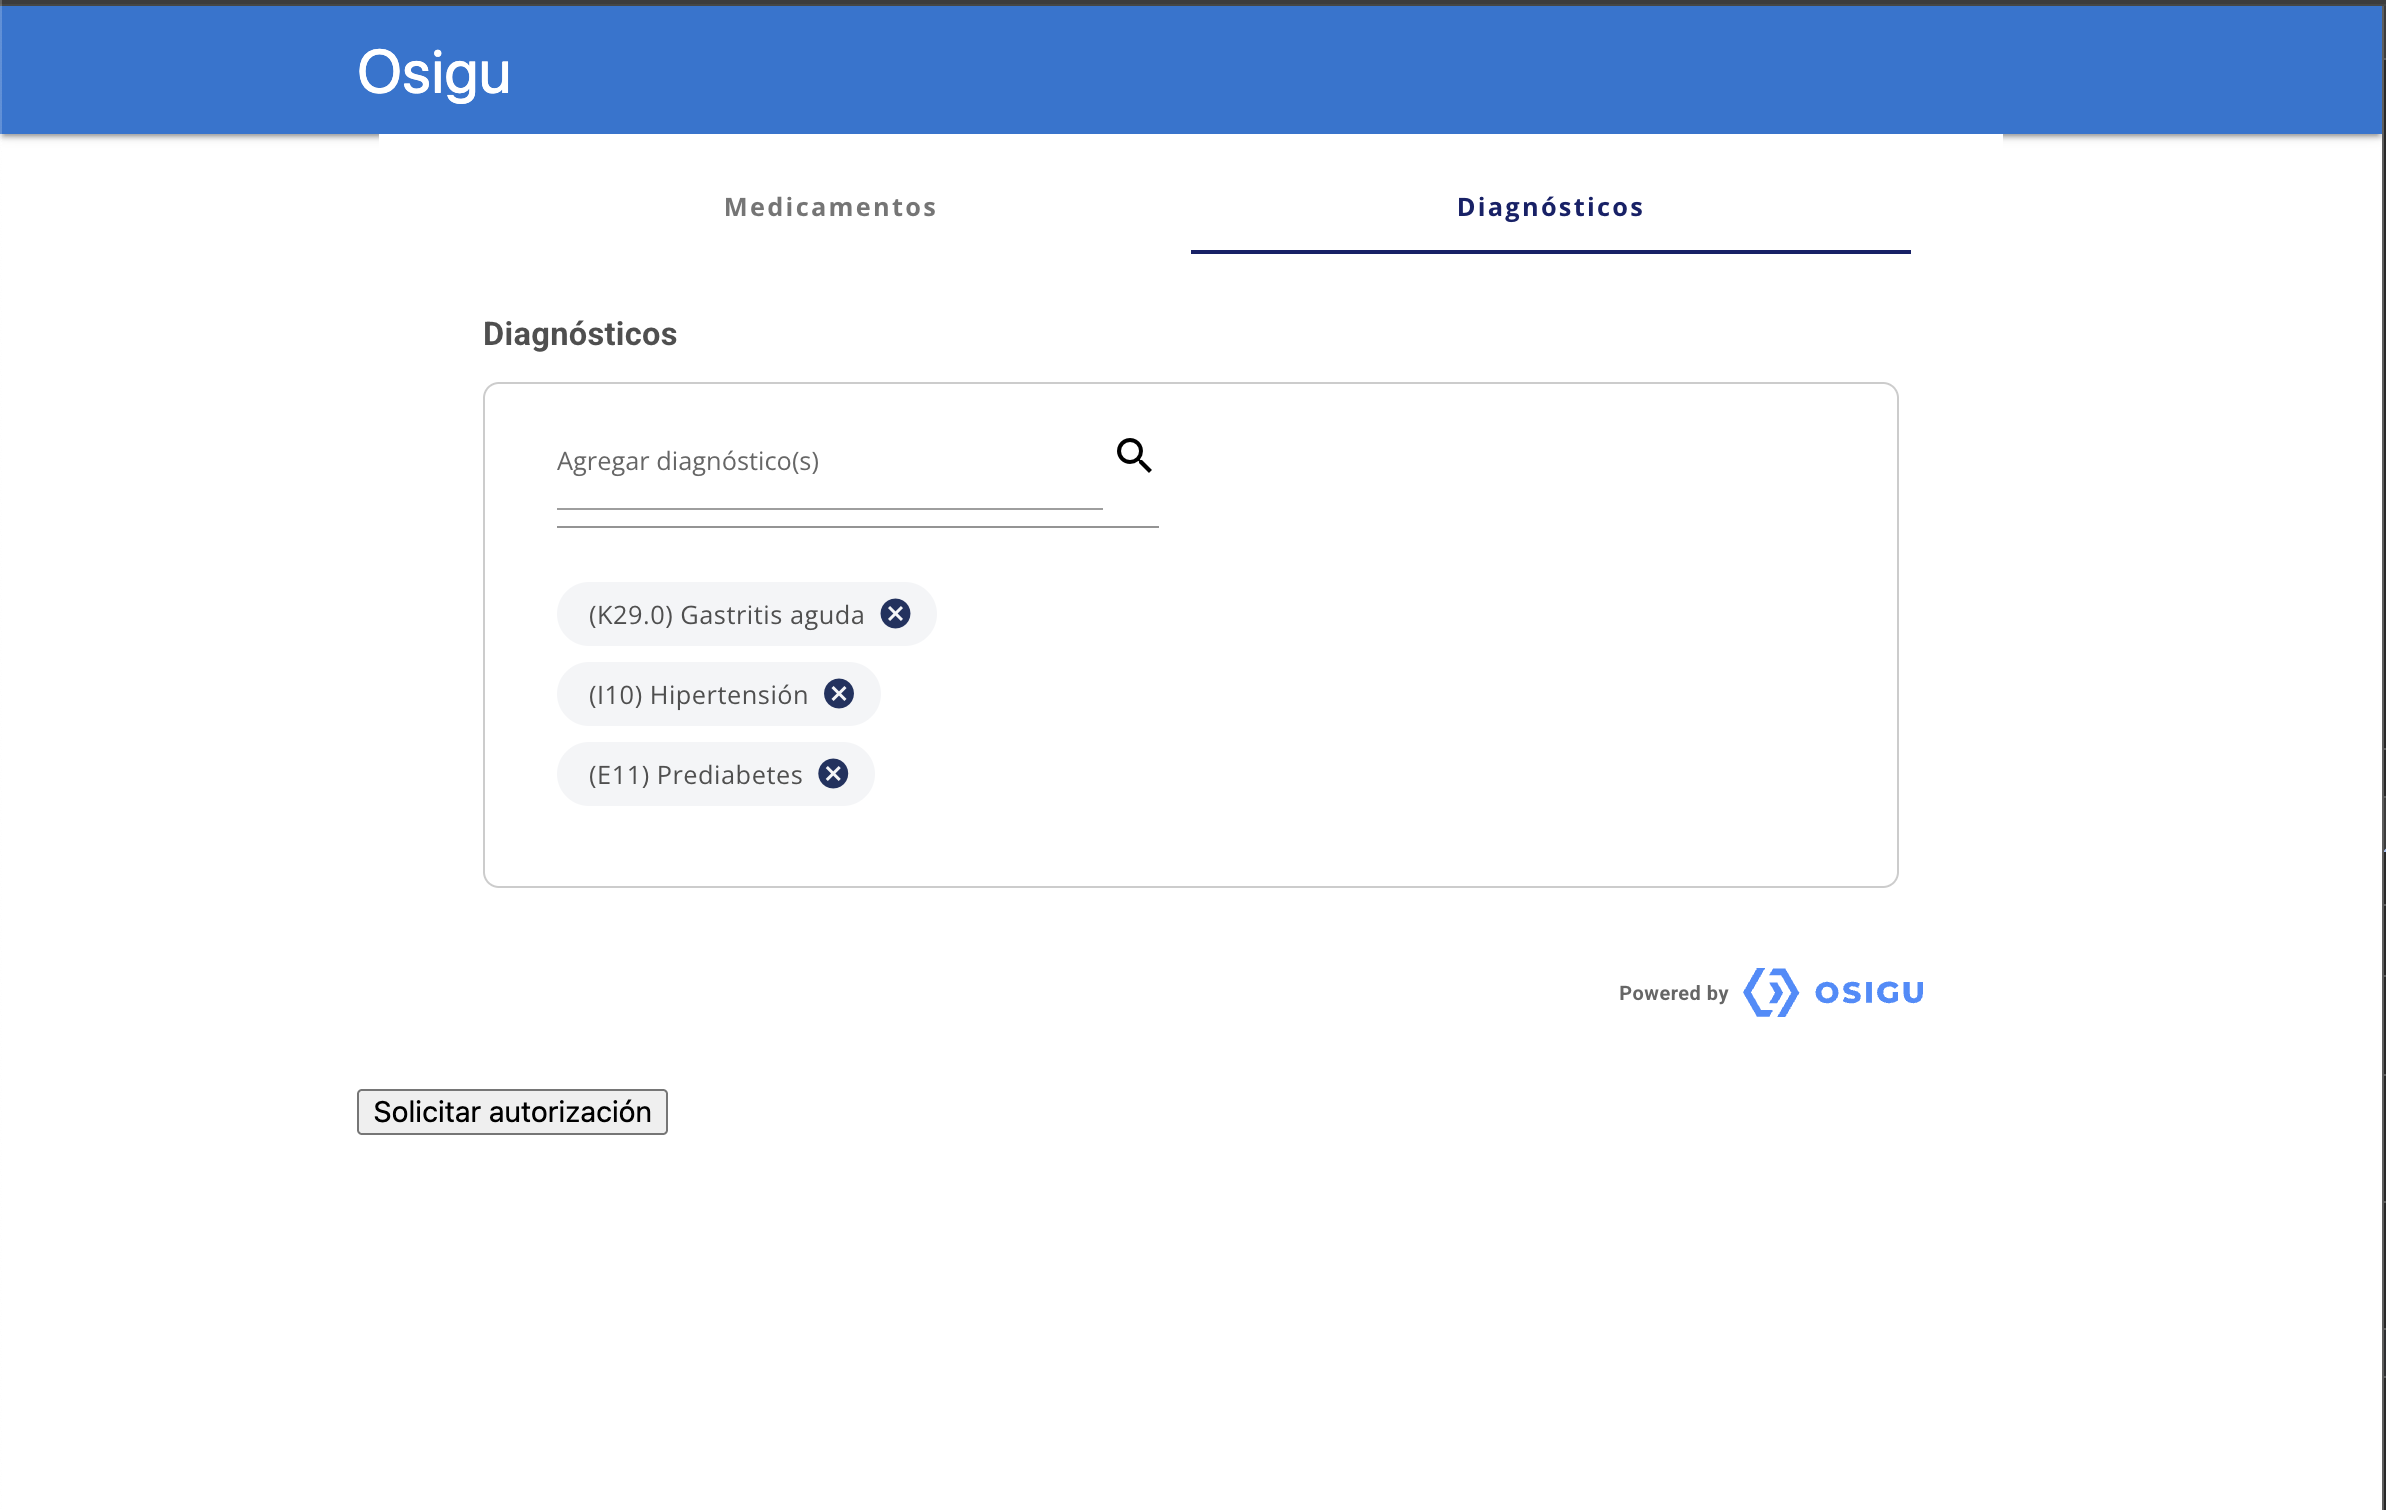
Searchable ICD-10 diagnosis picker. Multiple diagnoses can be attached to the same authorization request as chips.
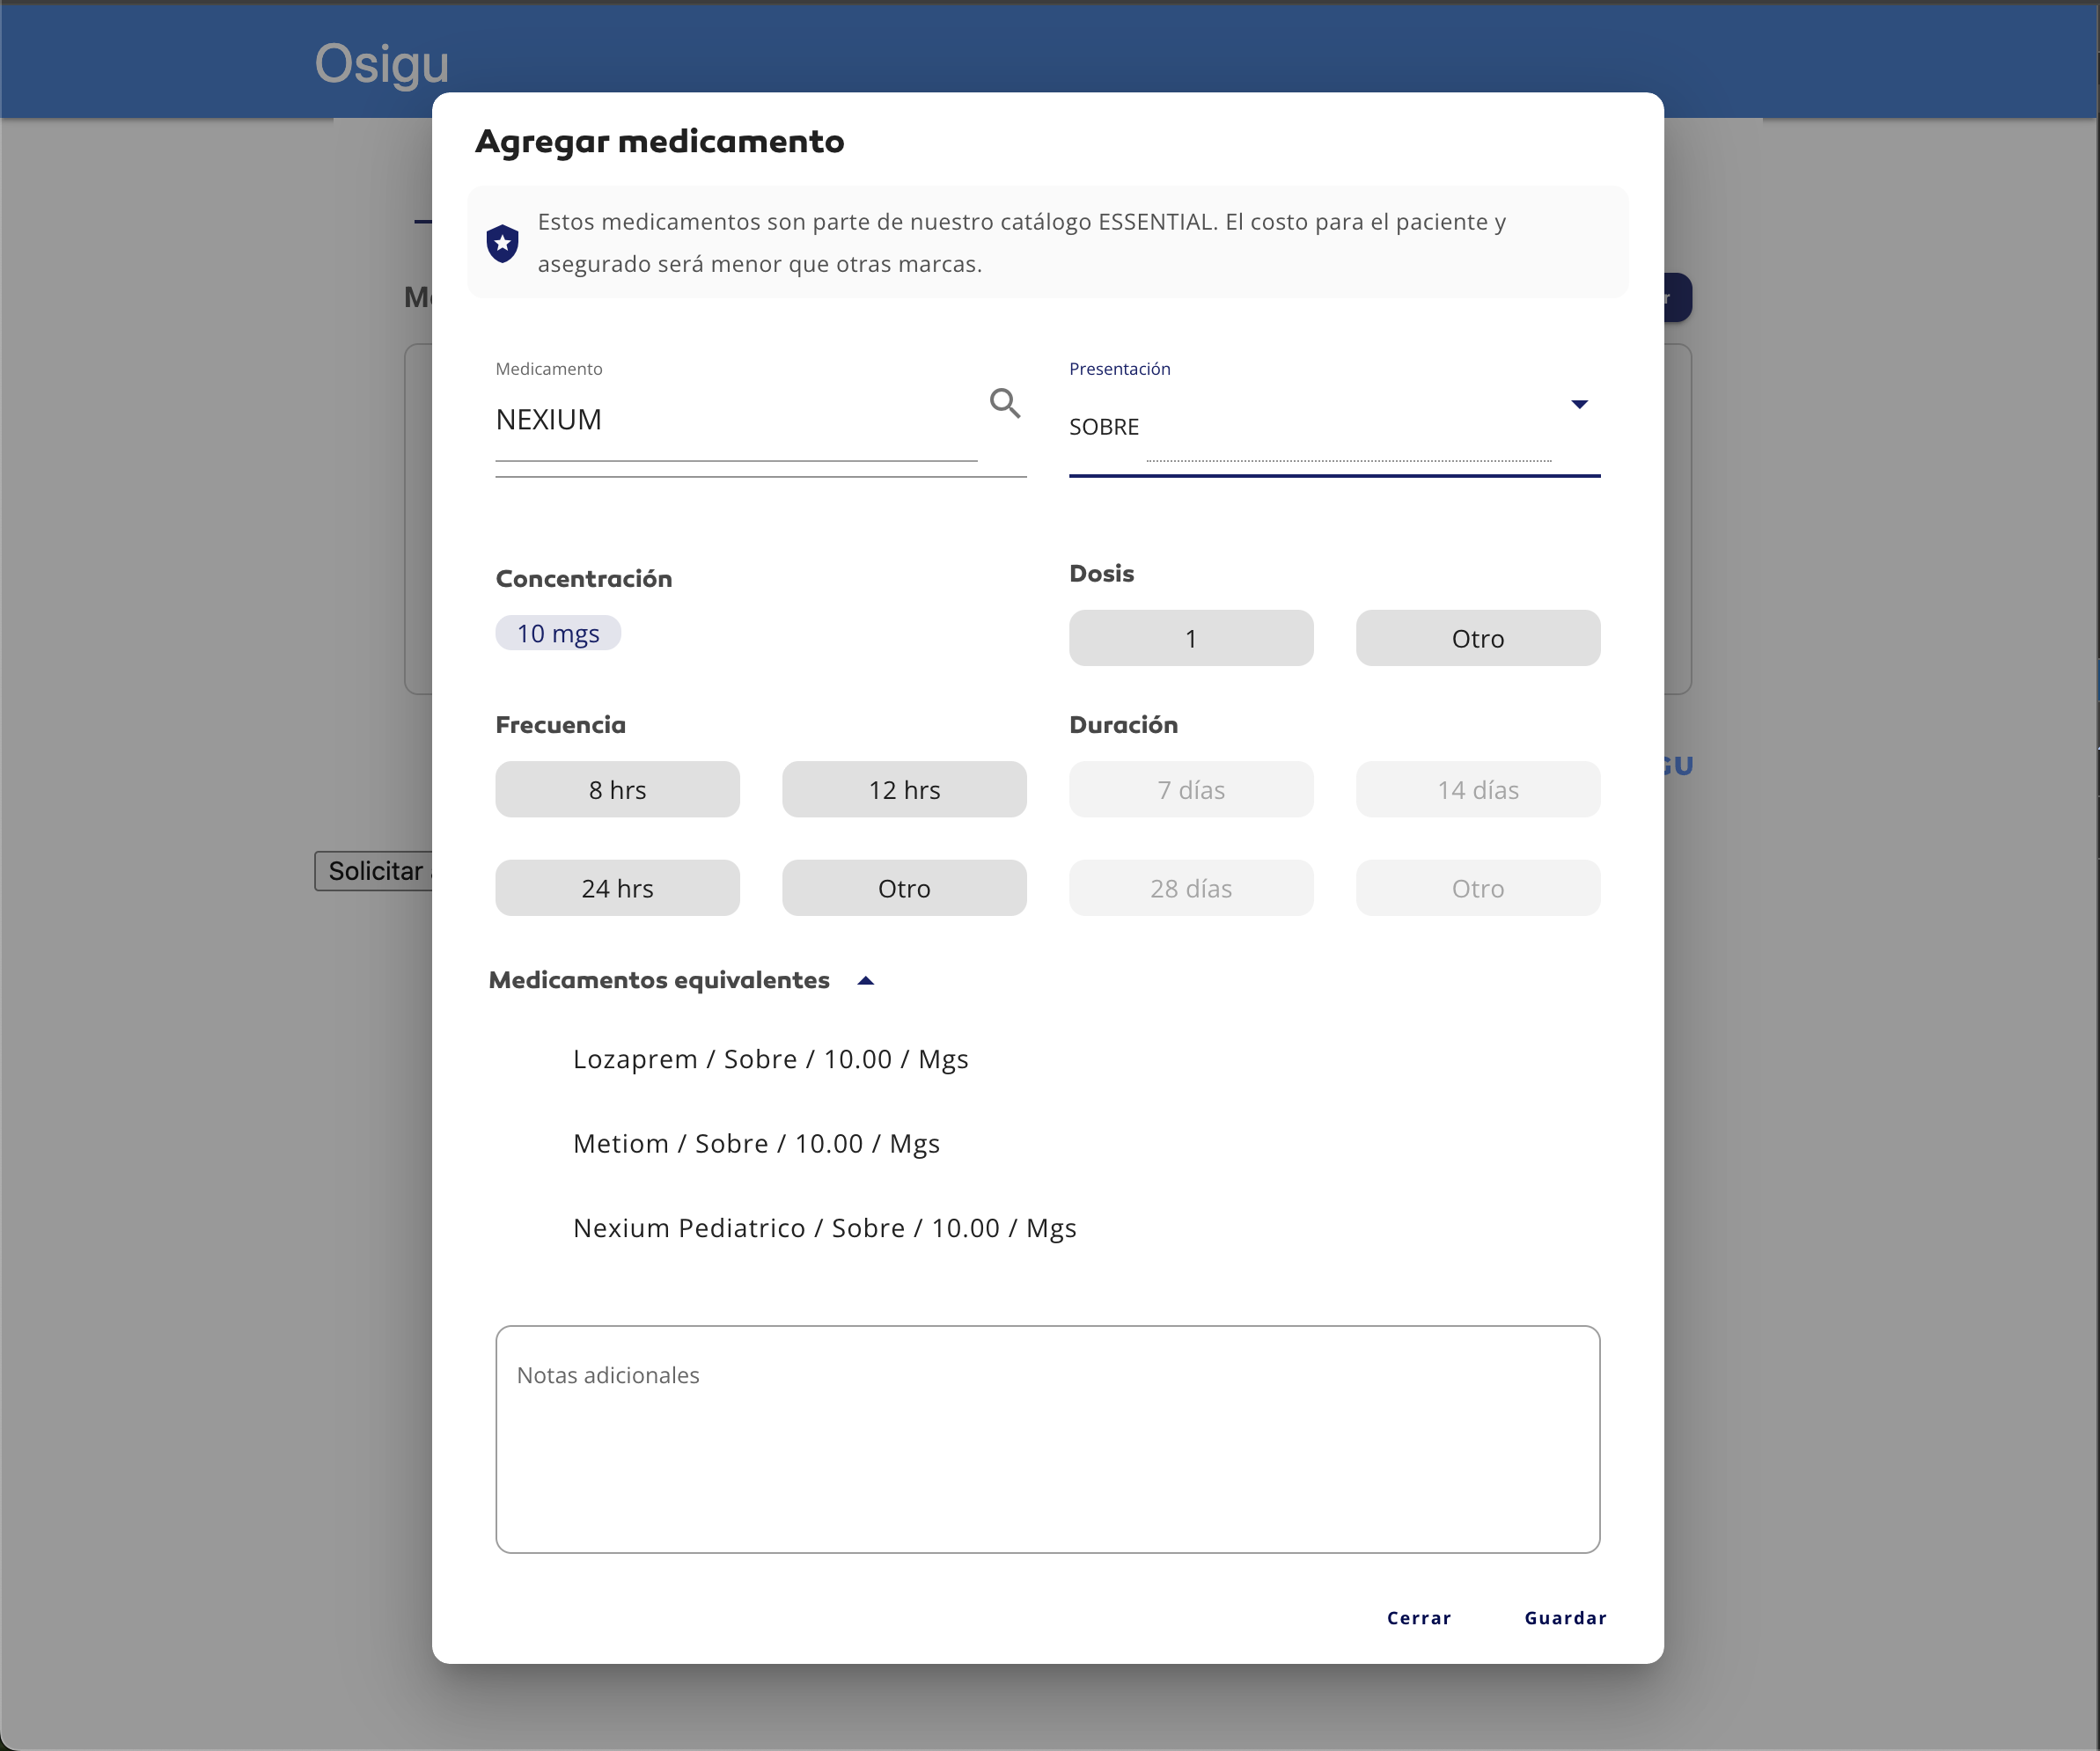
Modal that opens on + Agregar. The doctor picks the medication and presentation, sets dose / frequency / duration, and can review equivalent products (INN alternatives that reduce out-of-pocket cost).
Anatomy
Conceptually, the widget renders four sections inside your host <div>:
Layout and styling are up to Osigu — see the screenshots above for the actual rendered look.
Contract with your app
Your app is responsible for:
- Loading the widget — one
<script>tag pointing tohttps://widgets.osigu.com/v1/loader.js. - Providing an OAuth token — via
getToken()in the config. The widget calls this whenever it needs to refresh. - Handing outcomes back to your app logic — the widget emits
complete,error, andcloseevents. You persist the result (e.g. theauthorization_code) and move on.
The widget is responsible for:
- Rendering the flow, in the language matching your app's locale.
- Calling every REST endpoint the flow needs.
- Handling sponsor-specific quirks (OTP, file_type, additional-data).
- Reporting a single, structured outcome via
completewhen the beneficiary finishes.
What the widget doesn't do
- Doesn't handle claim submission — that's your backend after the widget completes.
- Doesn't persist anything on your side — you get the outcome via event, then store it however you like.
- Doesn't do authentication — you supply the OAuth token; the widget just uses it.
Next steps
- Installation — load the loader, mount the widget.
- Configuration — all options.
- Events — the events you'll listen to.
- Customization — theming and behaviour hooks.
- Troubleshooting — what to do when things go sideways.